Week 1- Week 7 (06/01/20 - 21/02-20)
Nyoman Anita Putri Arimbawa (0339942)
Information Design
Final Project - Animated Infographic
INSTRUCTION
WEEK 1 - Research :
In the first class of the week, Mr. Shamsul gives us a briefing on the final project that will be guided by him, the final project is about animatic infographic that we have to make in a group that we already make previously in Ms Anis class. There are a few topic available, my group got natural disaster.
For this Final project we have to make an animation infographic
about a given topic (min 1.5 - max 3 min video).
We did a few research here and there, there are a few ideas for a natural disaster like the one really viral right now is the flood in Jakarta and also the bush-fire in Australia but after a further discussion we decided to make a volcano eruption because Indonesia have so many volcanoes but Mr. Shamsul told us to just focus on the Krakatoa mountain and its child.
Week 2 - Narrative and Mood board :
Then we proceed by making the moodboard and also the narative
Week 3 - Story Board :
I took part of making the graphic, so I'm in charge of making the story board first i did a few sketches on making the character and all the other asset
 |
| Fig 3.1: Sketching Character |
 |
| Fig 3.2: Sketching Storyboard |
 |
| Fig 3.3: Making Storyboard |
 |
| Fig 3.4: Making Storyboard |
WEEK 4 - Animatic
For the animatic, firstly I need to digitalize the storyboard
For this Im using adobe Ilustrator and Mr. Shamsul did a lecture about Illustrator in this week class he said it will be easier if we did the drawing traditionally the trace it in Illustrator and I did the same thing with the character and also the mountain.
 |
| Fig 4.1: Digitalize Storyboard |
After we did the storyboard the next step for our project us to create the animatics.
We did our process in the After effect
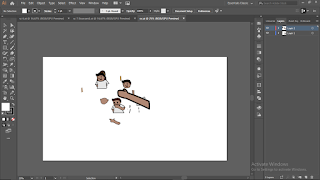
WEEK 5 - Making Asset
After we finalize the story board is time to make the asset that were going to use in the animation
The process is to finalize the drawing is that to improve what's on the storyboard making it more neater and nicer.
And its so much helping if we did the asset per scene that is in the animated
 |
| Fig 5. 1: Making Asset |
 |
| Fig 5.2 : Making Asset |
 |
| Fig 5. 3: Making Asset |
 |
| Fig 5. 4: Making Asset |
 |
| Fig 5.5 : Making Asset |
 |
| Fig 5. 6: Making Asset |
 |
| Fig 5. 7: Making Asset |
 |
| Fig 5.8 : Making Asset |
 |
| Fig 5.9 : Making Asset |
WEEK 6 - Making The Animation and Voice-Over
For the animation we mainly use the storyboard as our main guide lines but there are a few changes in the animation that we make.
 |
| Fig 6.1 Animation |
 |
| Fig 6.2: Animation |
For the VO we accure some hiccups when finding the right place to record we search many different places
 |
| Fig 6.3: Voice Over |
WEEK 7 - Sound Effect and Transition
 |
| Sound Effect |
WEEK 8 - Combining and Finalizing


Comments
Post a Comment