27/8/19- (week1-week5)
Nyoman Anita Purti Arimbawa (0339942)
Digital photography and Imaging
Exercises
EXERCISE 1:
Week 1 (27/8/18)
The basic of photoshop, make Dora seems like she's in Hearst mansion, We learn many basic photoshop tools such as quick selection tool, mask layer, free transform. We also learn how to copy a layer, make an adjustment on color to match color from background and also add ripple effect.
 |
Figure 1.1 Dora the Explorer Movie
|
 |
Figure 1.2 Hearst Mansion
|
 |
| Figure 1.3 Layering Proses. |
For the next exercises, we have to photoshop ourselves in the heart mansion.
 |
| Figure 1.4 My Photo |
 |
| Figure 1.5 Final Result |
Week 2(3/09/19):
The second week we learn how to makes the old house to have a different background and then add the ghost bride to it, we learn how to invert the mask, use the gradient tool and also use a different blending mode
 |
| Figure 2.1 Old House |
 |
| Figure 2.2 dark cloud |
 |
| Figure 2.3 ghost bride |
 |
| Figure 2.4 layer proses |
 |
| figure 2.5 Puting the ghost bride |
 |
| Figure 2.6 Final result |
For our exercise, we did de same thing but with a different house and a different background
 |
| Figure 2.7 Sunset Replacement |
 |
| Figure 2.8 Old house |
 |
| Figure 2.9 Final Result |
week 3 (10/9/19)
Fo our third exercise we learn how to recolor a black & white image. We mostly playing around with the blending mode.
 |
| Figure 3.1 Old Guy Portrait |
 |
| Figure 3.2 Recoloring Process |
 |
Figure 3.3 Final Result
|
For our next exercise, we have to pick an image from the internet then recolor it
 |
| figure 3.4 Original Picture |
 |
| Figure 3.5 Coloring Process |
 |
| Figure 3.6 Layer Process |
 |
Figure 6.7 Final result
|
Week 4(17/09/19)
For week four we learn
how to use a displacement map, we have to make a map to look like its a silk.
How the displacement map
work is using the black and white values the same as a mask.
 |
| Fig
4.1 Silk Texture |
 |
| Fig
4.2 Indian Flag |
 |
| Fig
4.2 Make a Displacement texture |
 |
| Fig
4.3 Layer Process |
 |
| Fig
4.4 Final Result |
Then we have to do the
same thing with but with a portrait of a man,
 |
| Fig
4.5 Old man |
 |
| Fig
4.6 Texture scale |
 |
| Fig 4.7 Layering Process |
 |
| Fig 4.7: Result |
For our exercise, we have to create our own version of the practical. We have to find an animal and change it with a different texture,
The first attempt of this exercise was in class, cause I having trouble connecting to the school wifi, I couldn't search any picture from the internet, so I use a picture of my cat.
 |
| Fig 4.8: Picture of my cat. |
Then I use the texture scale (Fig 4.6) that were given to us, and I use it to change the texture of my cat,
 |
| Fig 4.9: Displacement process |
 |
| Fig 4.10: My cat with a texture scale. |
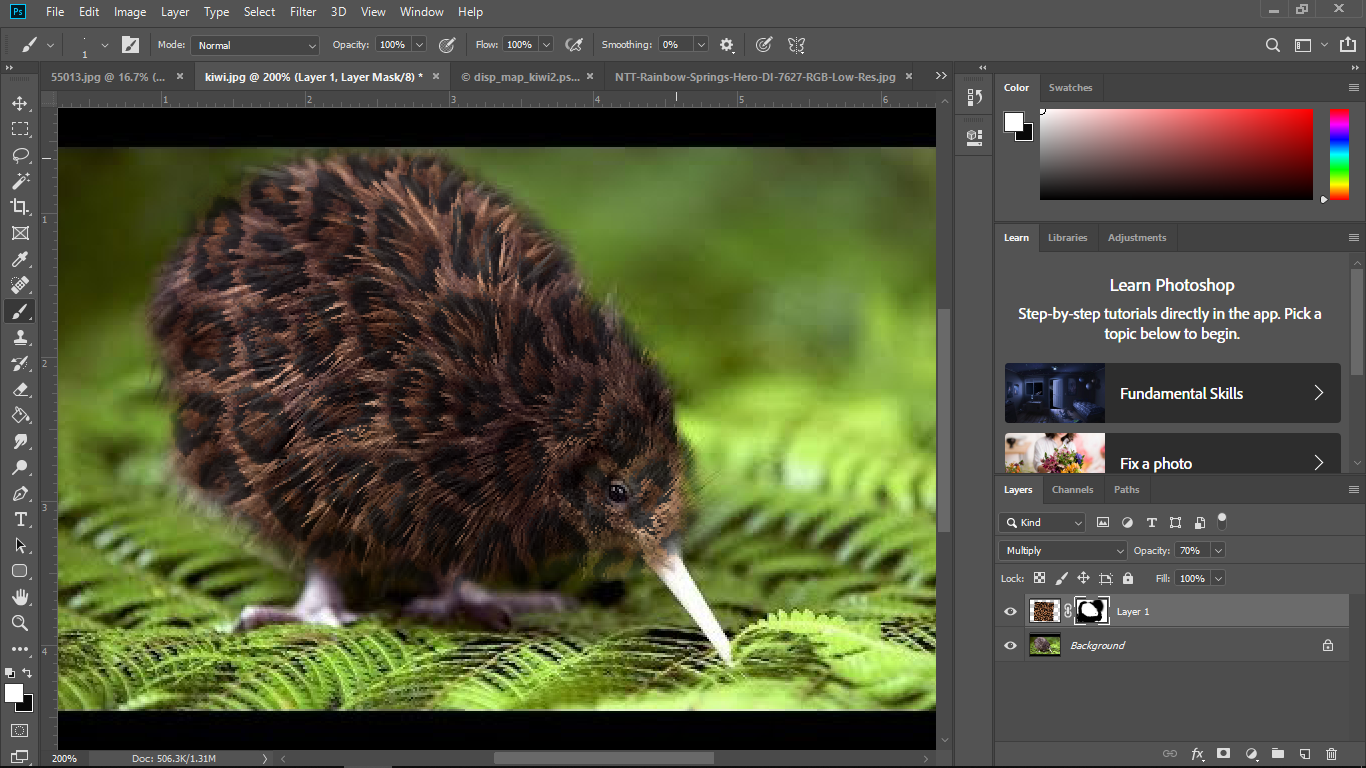
I still want to play around more with the exercise, so when I finally got a connection, I chose a picture of a kiwi bird,
 |
| Fig 4.11: Kiwi Bird |
 |
| Fig 4.12: Leopard Texture. |
 |
| Fig 4.13: Displacement map of kiwi bird |
then I realize I wasn't really happy with the result then I tried to find a better quality picture for the kiwi bird.
 |
| Fig 4.14: Second picture of a kiwi bird. |
 |
| Fig 4.15: Making Displacement map file of the kiwi bird. |
 |
| Fig 4.16: Adding a distort layer. |
Then I wanted the beak to have a different texture, so pick an iguana scale.
 |
| Fig 4: 17: Iguana texture |
 |
| Fig 4.18: Making a displacement layer |
And then I decided to change the eye of the kiwi bird, I pick snake eye
 |
| Fig 4.19: Snake eye |
 |
| Fig 4.20: adding snake eye |
 |
| Fig 4.21: finishing touches |
 |
| Fig 4.22: Final Result of exercise 4. |
Exercise 5
For week five, Mr. Martin instructed us to do what has given in google classroom which is to find a 3 picture with HD resolution: a portrait background with a horizon, a castle and a rock.
 |
| Fig 5.1: Rock Picture |
 |
| Fig 5.2: sky photo |
 |
| Fig 5.3: Castle |
 |
| Fig 5.4: Process |
First thing I did is opened the sky image,
 |
| Fig 5.5: Putting the rock |
Then, I proceed to add the rock, I did this by using the quick selecting tools then, mask it and copy the layer to my sky image.
 |
| Fig 5.6: Resizing & Placing |
Next thing I did is using the matching color that is in the image so that the rock has a related color with the background,
 |
| Fig 5.7: Blending mode |
then I wanted to add more color and depth in the rock, I decided to copy my rock layer and added a blending mode, using the brush tool I added more shadow and highlight.
 |
| Fig 5.8: Putting the castle |
To add the castle to the rock, I did the same thing as I did with the rock.
 |
| Fig 5.9: Adjustment |
And I also use match color with my castle, and also a blending mode to add more shadow and highlight,
 |
| Fig 5.10: Process |
 |
| Fig 5.11: Process |
 |
| Fig 5.12: Process |
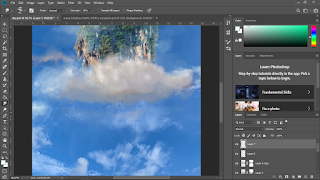
Then i feel the sky is to empty, i added some clouds
 |
| Fig 5.13: Cloud Picture |
 |
| Fig 5.14: Adding Cloud |
To add the cloud, I copied the cloud that I want then mask it and position it in the bottom of the rock.
 |
| Fig 5.15: Coloring |
I also add a blending mode by duplicating the cloud layer then I proceed by adding some color
 |
| Fig 5.16: Adjusting the cloud |
I still want to add more clouds but I couldn't find a right perspective of the clouds on the internet,
 |
| Fig 5.17: Drawing Cloud |
I decided to draw the clouds by hand, using the brush tool using some white and a bit of dark green.
 |
| Fig.5.18 |
Then I use the blending tool to make it seems like it a cloud
 |
| Fig 5.19 |
Then I added some more.
 |
| Fig 5.20: adding blur |
I proceed with my work by adding a blur and a noise to the rock.
 |
| Fig 5.21: Adding Noise |
 |
| Fig 5.23: Adding Blur |
I did the same with my castle.
 |
| Fig 5.24: Finishing Touches |
 |
| Fig 5.25 Final result |


Comments
Post a Comment